Bat Capes Tutorial
Quick...get our you sewing machine..whip up a cape and head to the Bat Cave...
...nananananananananananananananana...

BAT CAPE!
Alright so your ready to go?
MEASUREMENTS and PATTERN
A. Measure from wrist to wrist over the length of your arms and shoulders.
B. Measure the length from your neck to your waist.
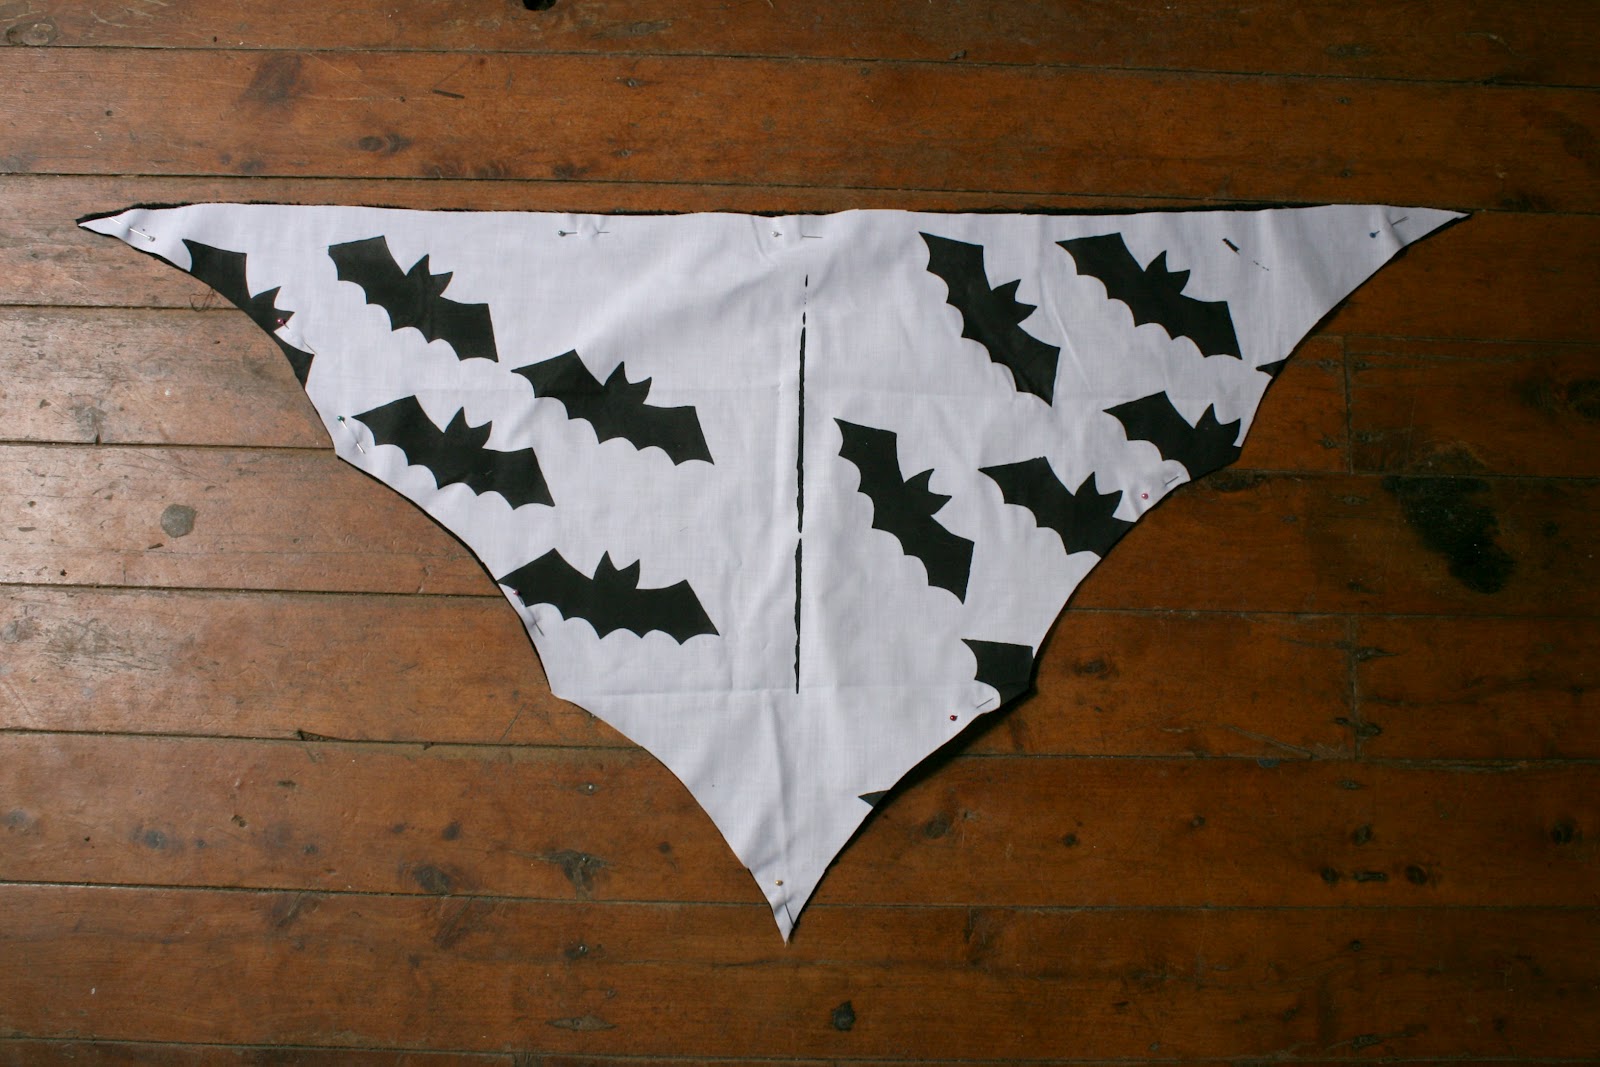
Add your desired seam allowance and draw up the pattern as below:
B. Measure the length from your neck to your waist.
Add your desired seam allowance and draw up the pattern as below:

I broke each side of the triangle into three sections for the wings but you can free hand this part or use you sewing maths to perfect the curves!
CUT
Cut out one of main fabric and one lining fabric from your pattern.
Also cut two lengths of fabric for your neck ties and 2 lengths of elastic for the wrist cuffs.
I used the main fabric for the ties and cut them 2.5" by 11" (twice) and sewed then along three sides, clipped and turned the right side out as below.
You could also use ribbon or similar which would save you a sewing step, simply cut 2 lengths of 11"!
THEN
Cut 2 lengths of 1/4" elastic 7" long as below.

MAKE
Fold the elastic in half and pin the ends together at each corner of the main fabric as shown below.
Baste in place.
Pin the ties along the top at your desired lengths apart. These will be around your neck so you need to ensure they fit well - test it before you baste it. I pinned mine 8" apart (4" either side of the centre) for Amelie's size 4 and 6" apart (3" either side of the centre) for Clementine's size 2.
Baste in place.

Elastic and Neck Ties Pinned in Place Above

Elastic Ties Pinned in Place Above
Place the lining and main fabric together, right sides facing each other. Pin securely around the cape.

Stitch around the entire cape, leaving a 4" opening at the centre top between the neck ties.

Clip around the curves and corners.
Turn right side out.
Press.

Hand stitch the opening closed - or top stitch if you prefer!
DONE!
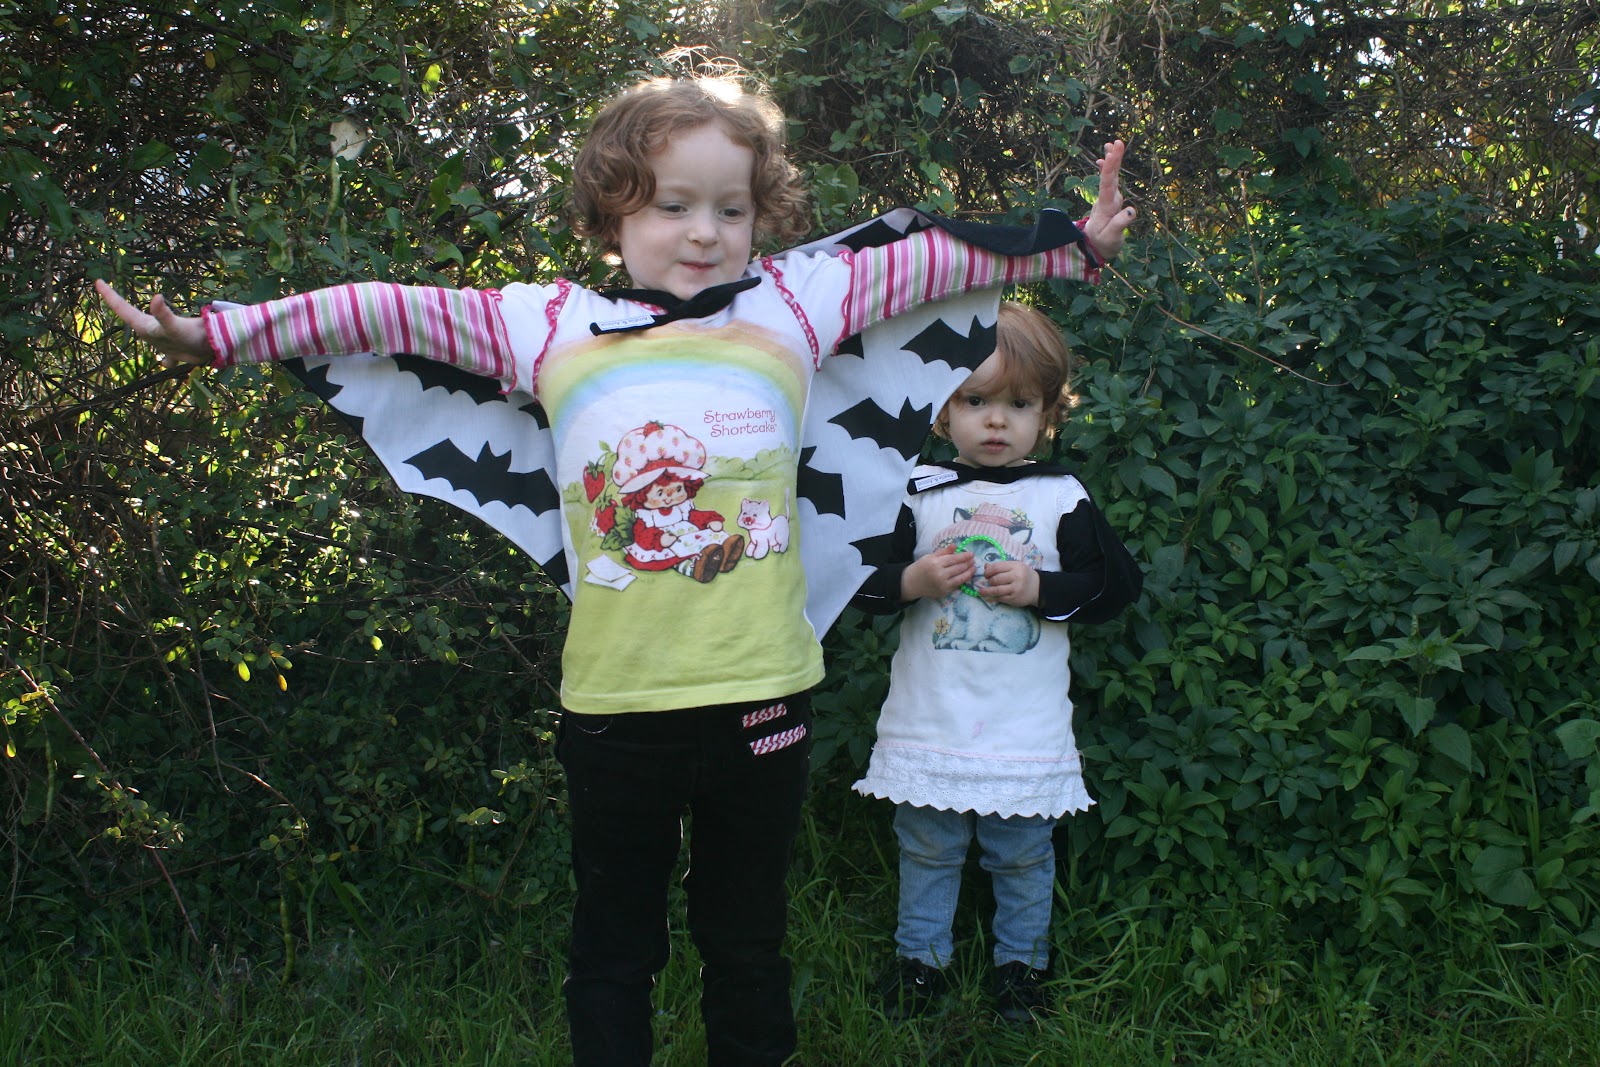
Ready to rock the cape!

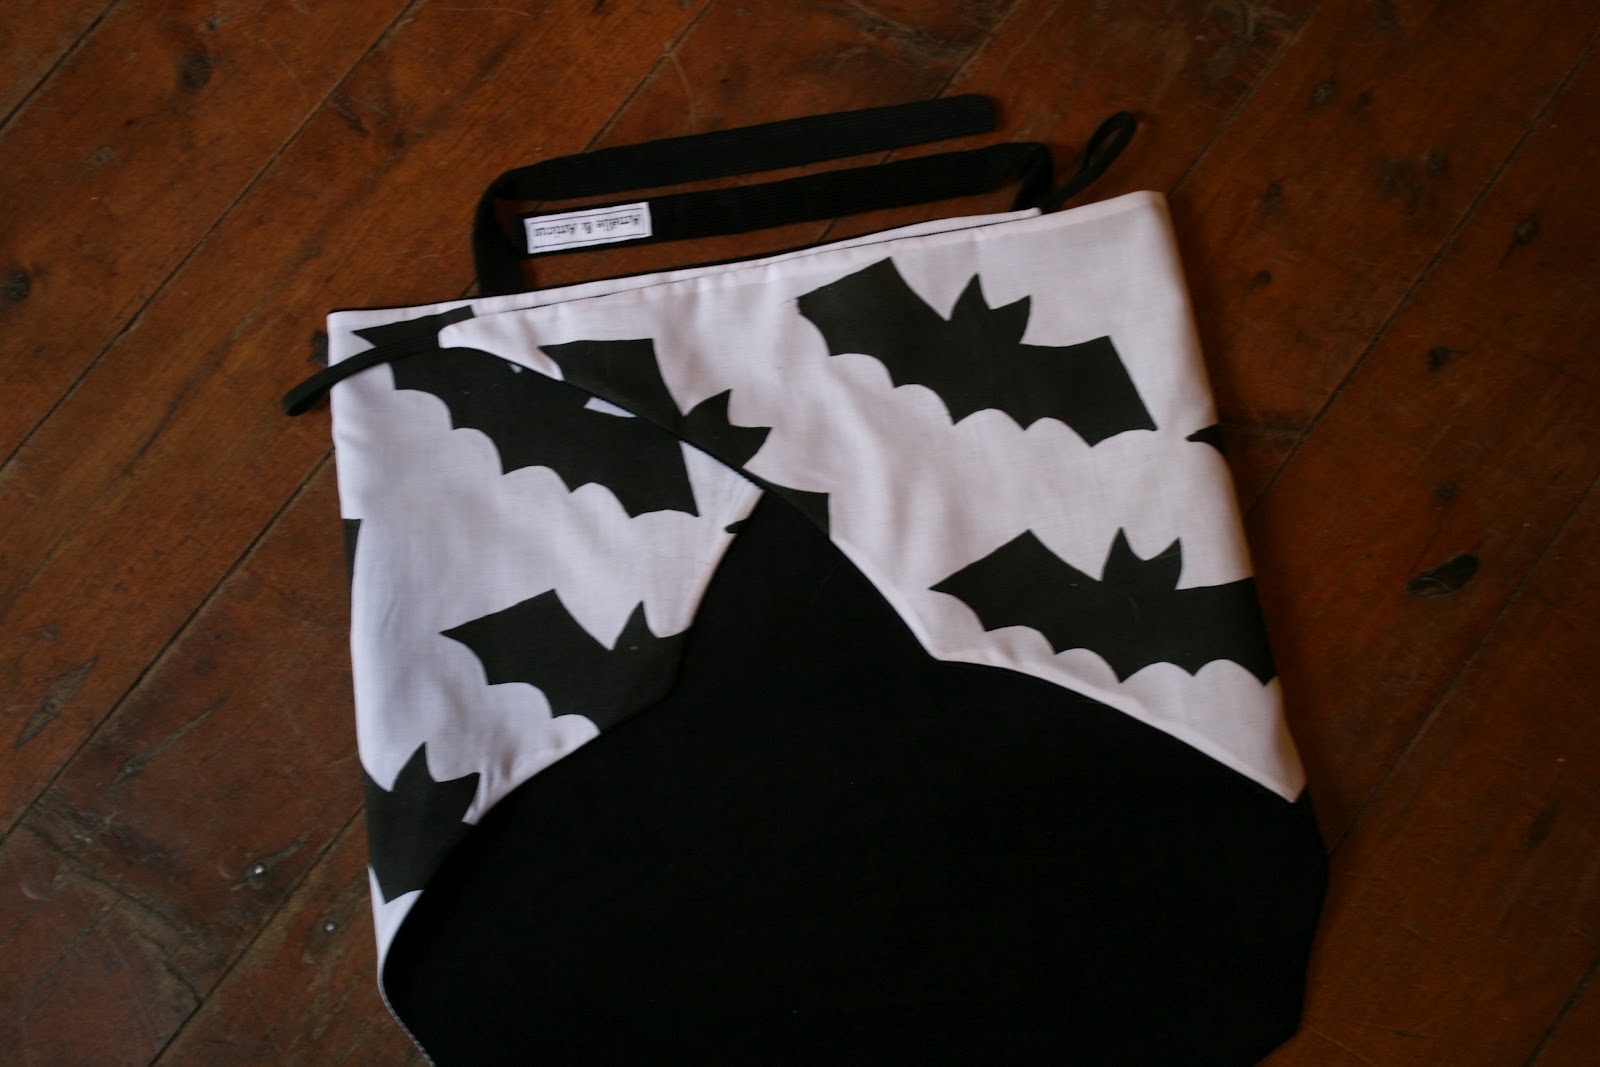
Size 2 - Lining Side

Size 2 Main Fabric Side
TO THE BATCAVE!


Comments
Post a Comment