Tutorial - How to Make a Dress Stitchery Tote
 Note
Note½ inch seam allowance included in all measurements
MATERIALS
Cut all pieces include ½” seam allowance
Front: Cut three panels 15” by 6 ½” (including the stitchery)
Back: Cut one panels 15” by 17 ½”
Iron-On Interfacing: Cut 2 panels 15” by 17 ½”
Lining: Cut 2 panels 15” by 17 ½”
Strap: 18 ½” by 5” – fold in half, then half again.
 STEP ONE – EMBROIDER DRESS DESIGN
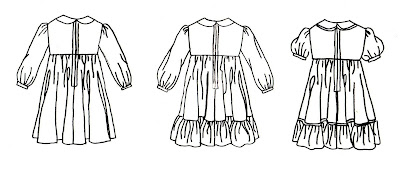
Cut a piece of calico (or chosen fabric) to fit your embroidery hoop. It will need to be at least 15” by 6 ½” for the finished piece.
Transfer the image from the dress design pattern onto your fabric. This can be done a number of ways. My chosen method is tracing the image on in pencil with the aid of a light box. If you don’t have such an item you can always use a window on a sunny day.
Once the image is on the fabric you can start stitching. For the attached image I used 2 threads of embroidery yarn in a straight stitch. Feel free to use any amount of thread you desire and you can experiment with different stitches.
 CUT
CUTCut all the pieces for the bag construction.
You will need to cut:
1. The stitchery piece that you have just embroidered to 15” by 6 ½”
2. Two panels of main fabric (Yellow in the main image) 15” by 6 ½”
3. One panel of calico or chosen contrasting fabric 15” by 17 ½”
4. Cut 2 panels of Iron-On Interfacing 15” by 17 ½”
5. Cut 2 panels of lining fabric 15” by 17 ½”
6. Cut 2 Panels for strap 18 ½” by 5” - one from main fabric and one from calico or chosen contrasting fabric
SEW
IRON on interfacing to the front and back pieces of the bag. Use the hottest iron setting, ensuring NO steam is used.
Stitch the three front pieces together with the stitchery in the middle (see above image). A seam allowance of ½” has been included is all the measurements. You can choose to top stitch the seams in place as I have done but this is optional.

Attach the front piece to the back stitching the sides and bottom of the bag, leaving the top open. Repeat for lining.
Clip the corners of the bottom of the bag and the lining being very careful not to clip the stitching. Fold and iron the top unfinished edge of the bag and the lining ½” to the wrong side. Turn the bag the right way out and insert the lining so that the wrong sides are together.
 To make the STRAP fold the fabric in half, press the edge and then fold half again, pressing the seam with the iron once more. Top stitch along the length of the straps ¼” from the edge, leaving the ends unfinished.
Place sewn straps 3 inches in on each side of the bag and tuck 1” inside the top of each bag. Pin the straps in place in between the lining and the bag. Top stitch ¼” from the top of the bag.
Clip the corners of the bottom of the bag and the lining being very careful not to clip the stitching.
 Fold and iron the top unfinished edge of the bag and the lining ½” to the wrong side. Turn the bag the right way out and insert the lining so that the wrong sides are together.
 To make the STRAP fold the fabric in half, press the edge and then fold half again, pressing the seam with the iron once more. Top stitch along the length of the straps ¼” from the edge, leaving the ends unfinished.
Place sewn straps 3 inches in on each side of the bag and tuck 1” inside the top of each bag. Pin the straps in place in between the lining and the bag. Top stitch ¼” from the top of the bag.
Trim any loose threads that you might have missed along the way.
MARVEL
At the awesomeness of your creation
At the awesomeness of your creation


ooohhh another project for my list....
ReplyDeleteI am enjoying embroidery a lot these days. I love this idea!
ReplyDeleteVery detailed and extremely wonderful advices on how to make a dress stitchery tote.Cheers and well done
ReplyDeleteWow,putting this to my diy list now. Thanks for sharing such wonderful diy direction.
ReplyDeleteVery good DIY project. I will try it.
ReplyDelete