Vintage Doll Face Cushion Tutorial
A quick little tutorial to make a Doll Face Cushion!

Step 1: Cut out your fabric
I cut 2 circles the same size using a bowl as a guide. One patterned vintage fabric and the other in calico!

I cut the doll's hair, eyes, cheeks and lips free hand from vintage sheets. It's fun to play around with the different shapes till you get your desired face!

Step 2: Attach the Face
Zig Zag stitch the facial features onto the calico. I used a length of 0.5 and a width of 3. These can also be hand stitched if you prefer!


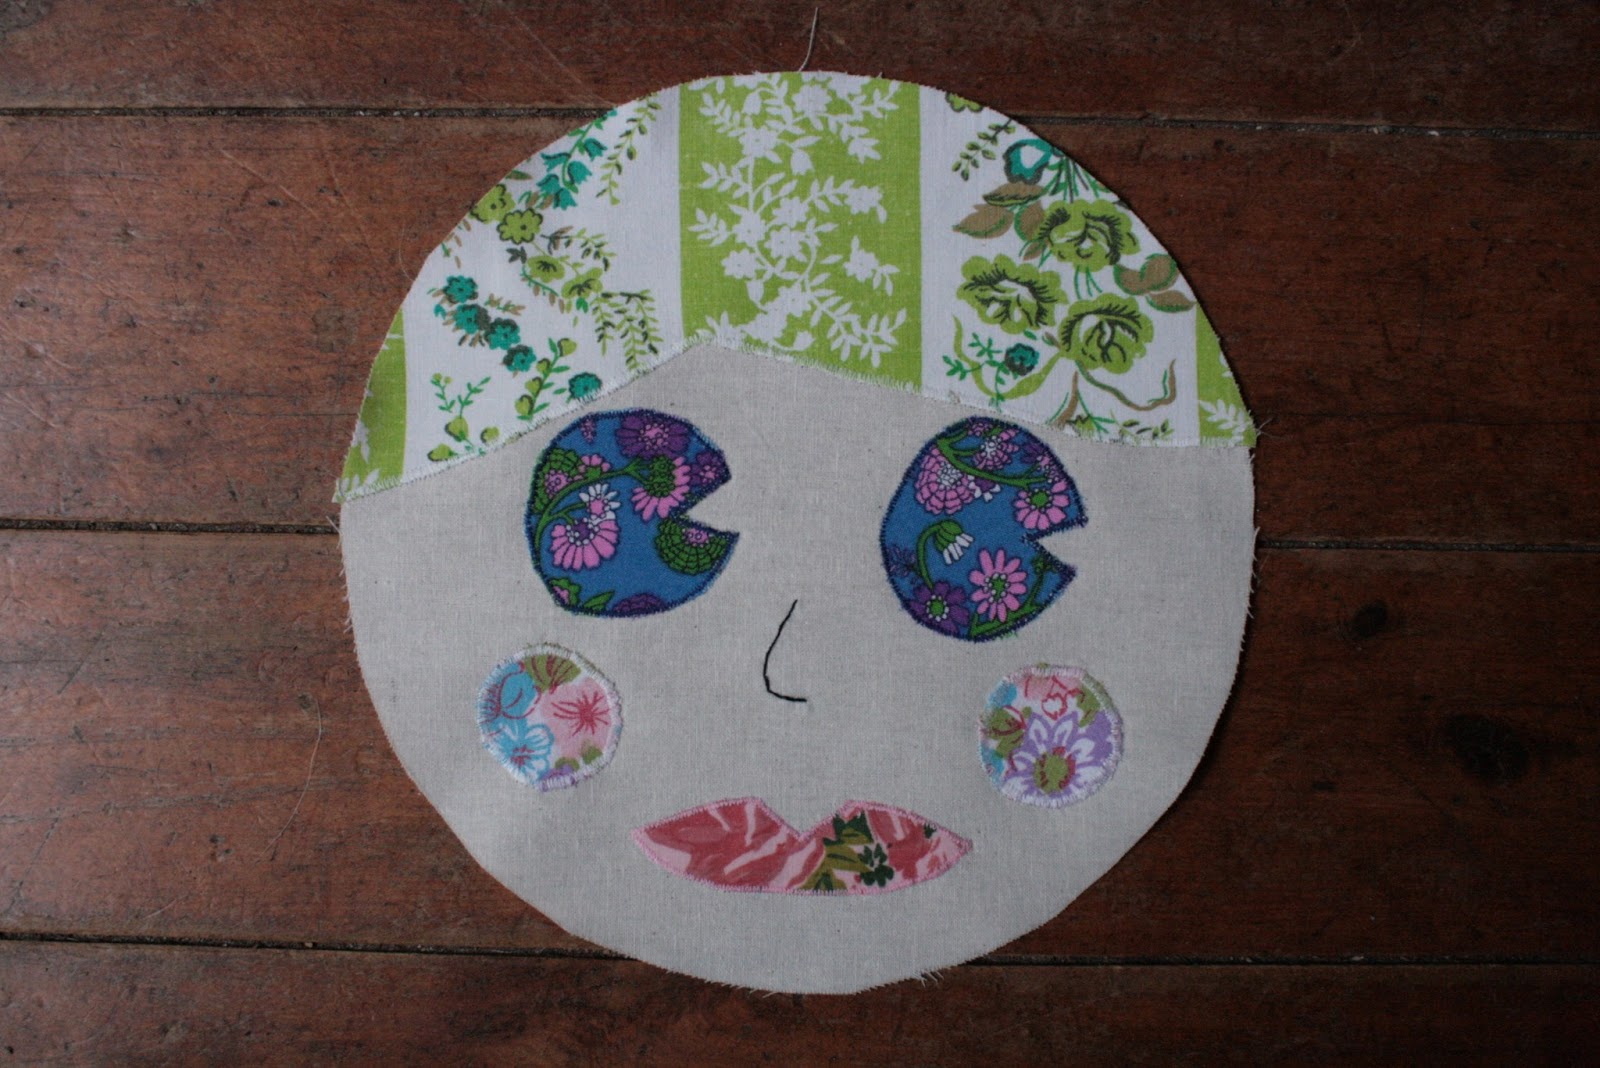
Hand stitch a little nose on! I used a simple running stitch with black embroidery thread.
Step 3: Make the Cushion

Attach the front circle to the back with right sides together. Stitch a 1/4 inch seam all around leaving a 1 1/2 inch opening.
Turn the cushion the right side out through the opening.

Step 4: Stuff and Stitch
Stuff the cushion with polyfill through the opening till you have your desired plushness. I filled mine right up but didn't over stuff it as I wanted it to have some give!
Hand stitch the opening closed and then TA DAH!
All Done!

This is a very quick project if you need to whip up something for a gift or to add some fun around the house!
This one was immediately stolen by my daughter Amelie and now lives on the top bunk with her...I will have to get stuck into making some more for myself...and Clementine!


cute - these are awesome :o)
ReplyDeleteWhat a neat idea! And a great way to use up scraps too!
ReplyDelete