How I Made Rapunzel
I used the same pattern that I used for the girl's Glinda costumes (above) and made the following amendments to turn her into Rapunzel!
I removed the longer sleeves and all the trims. I made the skirt width the same as the fabric I bought which was a less full than the pattern.
To make the two way colour sleeves I did the following:
Please note that I thought I was really really clever and would make it into a tutorial...then AFTER I did all this I saw many other Rapunzel costumes that sewed pink ribbon onto the purple backing which is a much easier and simpler way to get the effect...my hopes were dashed...but in the end I am glad I did them this way as I like the more even look!
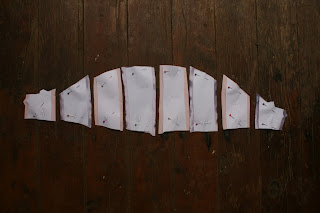
1. Trace the sleeve pattern and then draw lines approx. 2 inches apart from the centre.
2. Cut the sleeve strips and use as a guide to cut alternating pink and purple fabric. Please note that you will need to add a seam allowance to the sides of each sleeve section only - as shown bellow:
I marked mine with numbers so I wouldn't get mixed up!
3. Stitch the pink and purple pieces together, overlock and press.
Once attached to the bodice they will look like this:
To get the ribbon effect I chose to pin and stitch them down as opposed to loops so it can survive some tough Amelie and Clementine play!
Finally I cut down the band to a half width to neaten it up and be more in proportion!
So that's how I turned Glinda into Rapunzel!


Comments
Post a Comment